Administration Guides
Disable password change for SSO users
- Connect as root user.
- Click on the bottom left button
Admin - Click on
SettingsthenGeneral - Click on
Sign-in restrictions - Click on
Disable password authentication for users with an SSO identity - Click on
Save Changes
Assigning Permissions
The purpose of this procedure is to demonstrate how to assign GitLab permissions to a new user.
By default, a new user has no permissions in GitLab. They can still log in via SSO, but they won't see anything until someone grants them access.
Therefore, a user with permissions can grant them access (a user with permissions on groups/projects or a GitLab administrator).
Adding Permissions
To grant administrator privileges (normally reserved for system administrators): Assign administrator privileges.
For other cases, granting access to groups and/or projects involves standard GitLab actions:
For a group or project: 'Manage' menu / 'Members' and 'Invite' the user who needs access. Select the user and assign them a role (standard GitLab role).
Sandbox Permissions
By convention, the sandbox root group is dedicated to organizing source code projects for dataX profiles. Git projects intended for sandbox users must be made available directly in this root group or through subgroups.
Assigning Administrator Rights
The goal of this procedure is to grant a user full rights on GitLab = admin.
The user must first be created via Keycloak, then this user must log in for the first time to activate their GitLab account.
By default, the root account is defined in Kubernetes secrets to allow granting admin rights to the first administrator user.
Access GitLab with the GitLab administrator role (the first time with the root account).
Once logged into GitLab as a GitLab administrator, go to the admin area available in the GitLab menu.
![]()
On the admin page, go to Users and then find the user you want to modify.
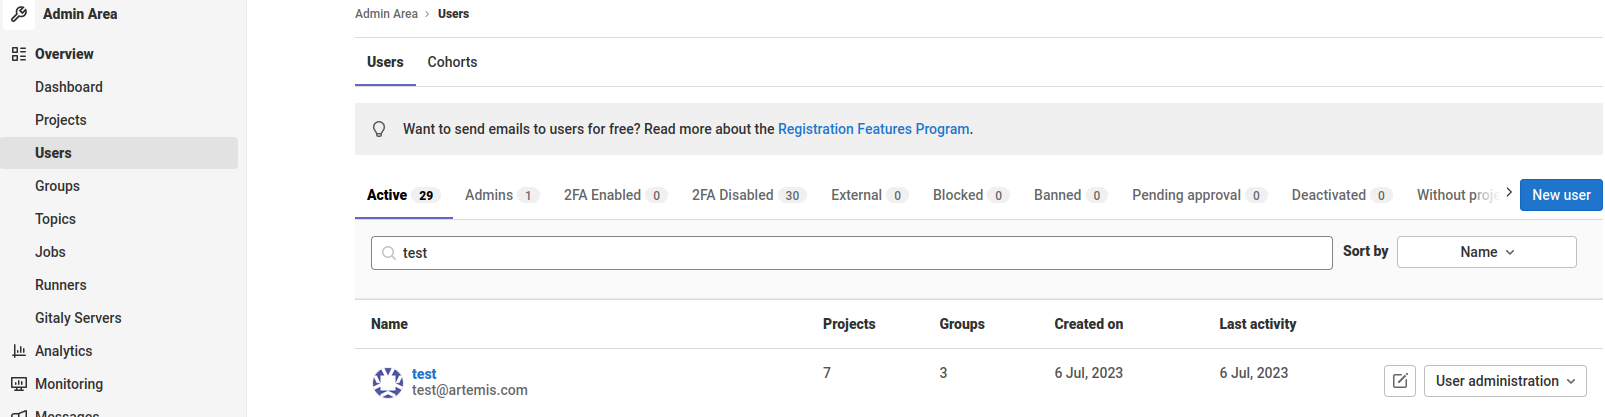
Click on the desired user and then on the Edit button.
Finally, in the edit menu, under the access section, you will find the Access level category, which you will need to change from Regular to Administrator.
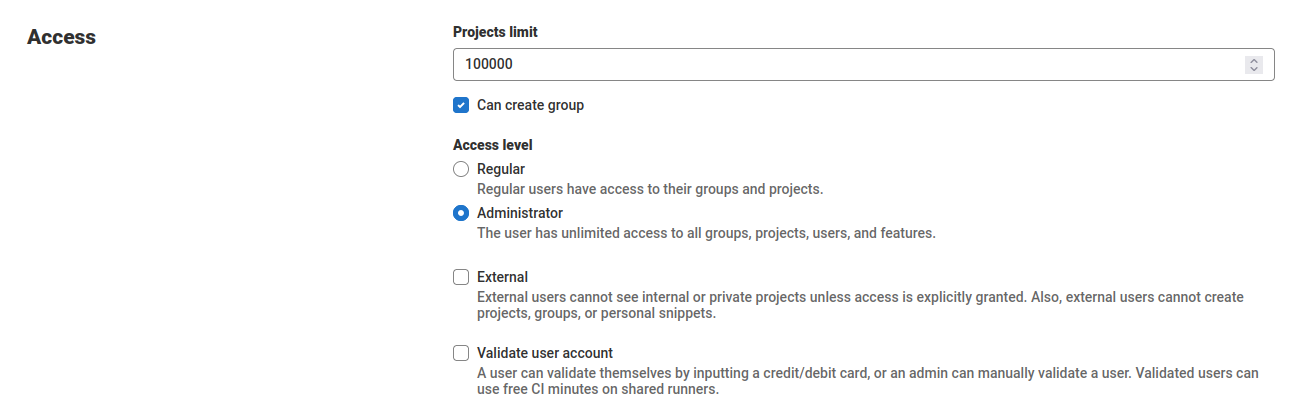
Your user is now a Gitlab administrator and has full rights across the entire Gitlab environment.
Deleting an application
This procedure allows you to delete a business application in Gitlab.
This procedure applies in case of a problem during the import of an application or when the application is deleted and uninstalled.
Several options are available to the administrator:
- Delete the entire application;
- Delete a component of the application;
- Delete a version of a component of the application.
First, if the application (or a version of the application) was imported via the application service, it must be removed from the SAP's imported applications catalog: procedure Delete an application
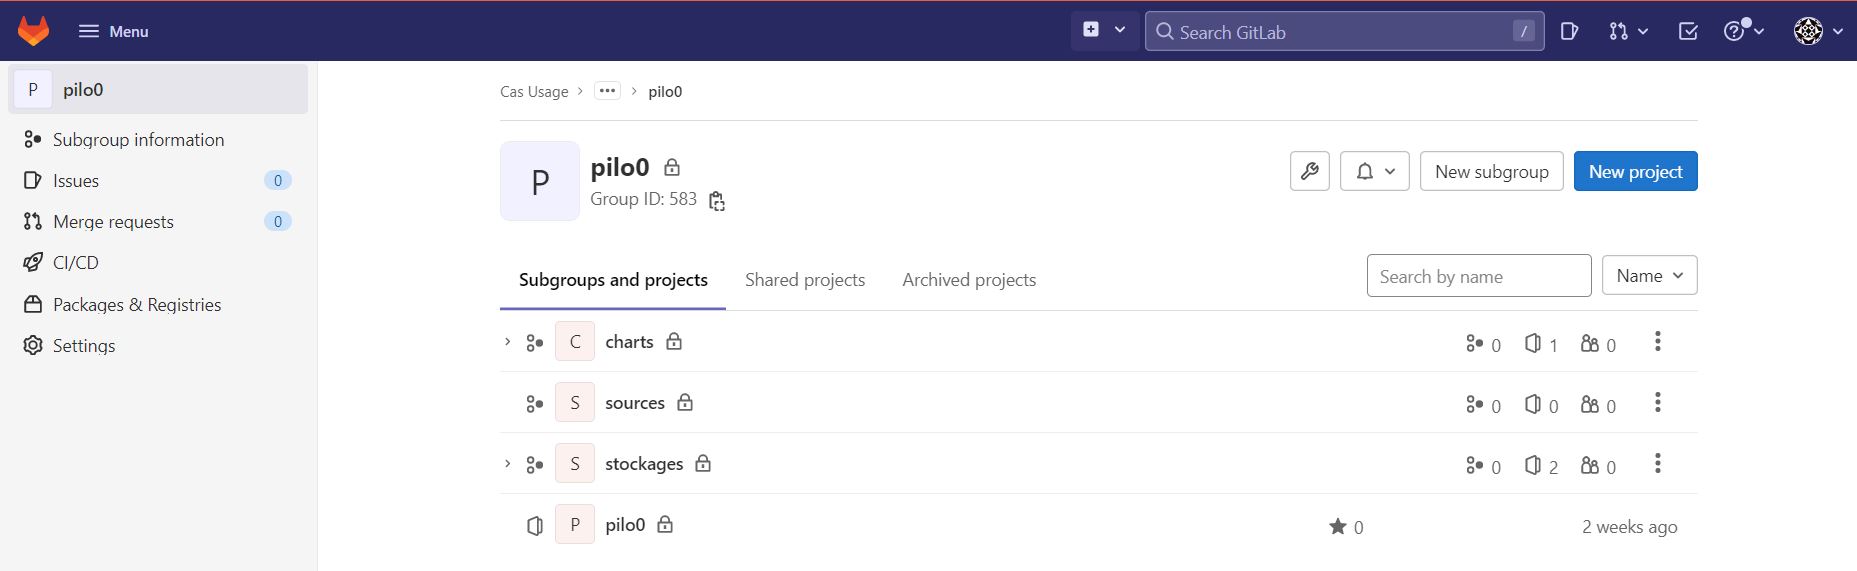
Check the application's group
All of an application's GitLab projects are grouped into a GitLab Group. In this case, deleting an application is equivalent to deleting the group.
- Use Case 1 details how to remove an application.
- Use Case 2 details how to remove a component from an application.
- Use Case 3 details how to remove a version of a component from an application.
Use Case 1: Remove an Application
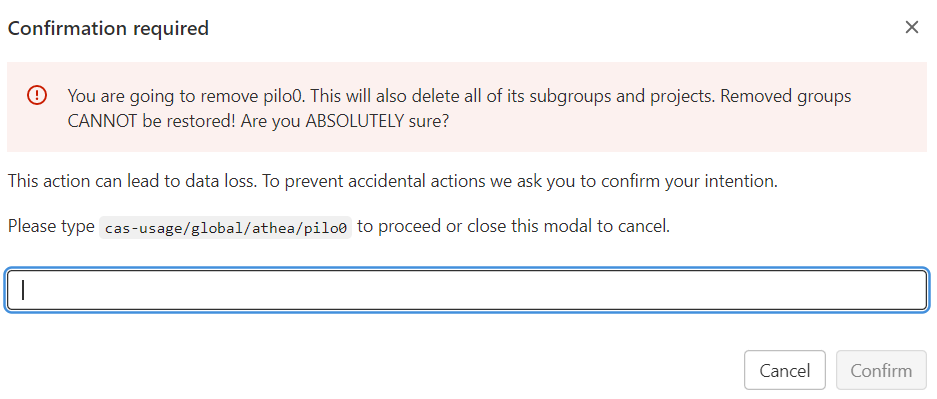
To remove an application, navigate to the group and select "Settings" / "General" from the left-hand menu. Then, on the page that appears, expand the last section, "Advanced," and click "Remove group."
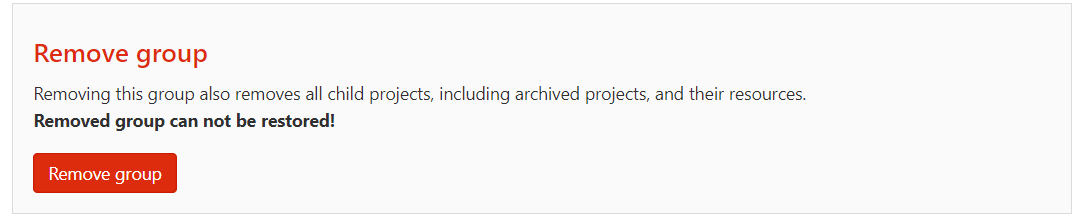
Note the warnings and confirm the removal as prompted.
Case 2: Deleting a Component
A component is represented by a GitLab project.
Steer the component's project and then delete either the entire project (see case 1) or a version of the project (see case 3).
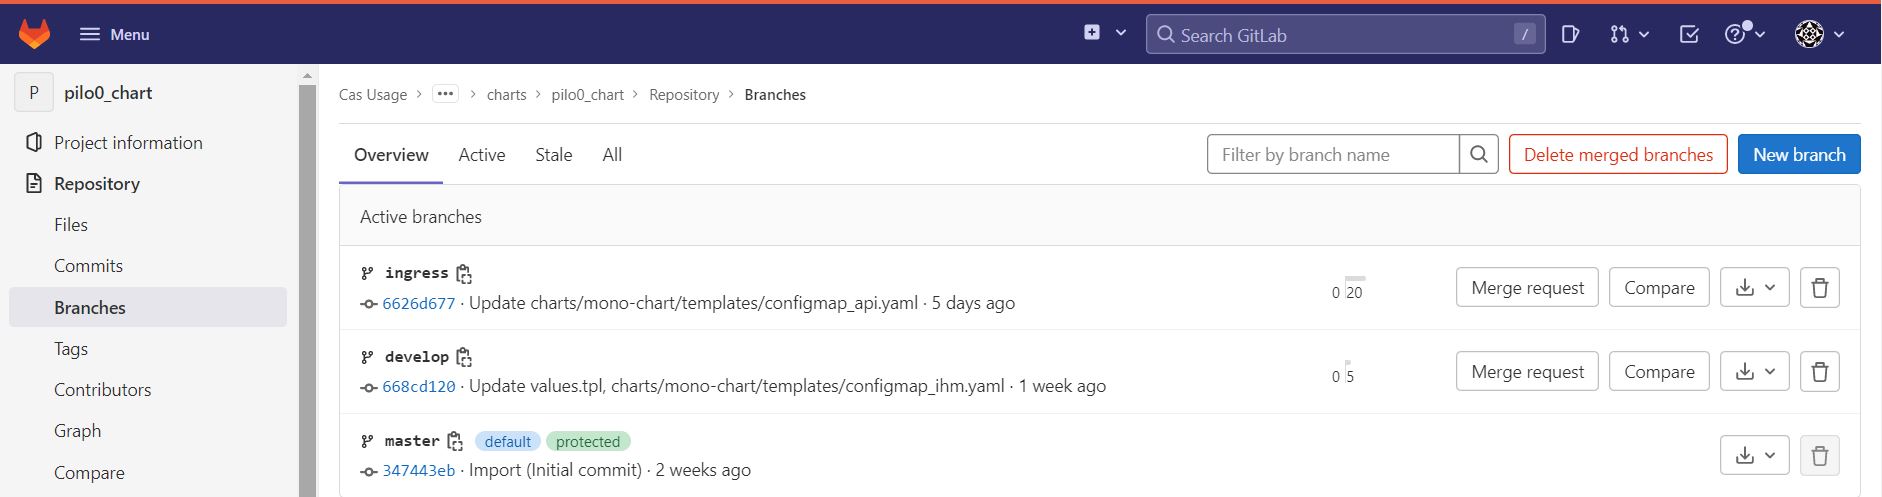
Case 3: Deleting a Version of a Component
A component's project in an application can contain several branches. Each branch corresponds to a version of the project.
In the left-hand menu, select "Repository" / "Branches", select the branch to delete, and click the delete icon.
Backup
Creating a backup
- Check that the "toolbox" pod is in the "running" state using the following command:
kubectl get pods -lrelease=gitlab,app=toolbox -A
- Configure backup-utility
kubectl exec -n <Toolbox pod namespace> <Toolbox pod name> -it -- bash
 # use the contents of the file below
 cat /home/git/.s3cfg
Example of correct configuration
cat <<EOF > "/home/git/.s3cfg"
[default]
access_key = gitlab_icsdqtaa
secret_key = XXX
bucket_location = us-east-1
host_base = s3-technique-hl.kosmos-s3.svc.cluster.local.:9000
host_bucket = s3-technique-hl.kosmos-s3.svc.cluster.local.:9000/%(bucket)
default_mime_type = binary/octet-stream
enable_multipart = True
multipart_max_chunks = 10000
multipart_chunk_size_mb = 128
recursive = True
recv_chunk = 65536
send_chunk = 65536
server_side_encryption = False
signature_v2 = True
socket_timeout = 300
use_mime_magic = False
verbosity = WARNING
website_endpoint = s3.kosmos.athea
use_http_expect = False
use_https = False
EOF
or configure for another s3 instance
edit gitlab-s3-secrets secret:
kubectl -n kosmos-dev edit gitlab-s3-secrets
- Check available buckets You may see different s3 buckets with "gitlab" prefixes Moreover, two buckets need to be available, "gitlab-backups" and "tmp" for your s3 you use in "/home/git/.s3cfg"
if you want to save more components from gitlab then you need to create the associated buckets in your s3 instance. You can choose which elements you want to backup please see gitlab https://docs.gitlab.com/charts/backup-restore/backup/#skipping-components
- Launch backup
# if step 2 is valid, run the backup creation command
 backup-utility --backend s3 --skip db --skip registry --skip lfs --skip pages --skip terraform_state
- Technical s3 check you must have several buckets with non-empty prefix "gitlab".
Backup secrets rails + gitlab-s3-secret
You should also back up a copy of the rails secrets, as these are not included in the backup for security reasons. We recommend that you keep your full backup, which includes the database, separate from the copy of the secrets.
- Retrieve the secrets names
kubectl get secrets -A | grep rails-secret
kubectl get secrets -A | grep gitlab-s3-secret
- Make a copy of the secrets
kubectl get secrets -A <rails-secret-name> -o jsonpath="{.data['secrets\.yml']}" | base64 --decode > gitlab-rails-secret.yaml
kubectl get secrets -A <gitalb-s3-secret-name> -o jsonpath="{.data['secrets\.yml']}" | base64 --decode > gitlab-s3-secret.yaml
Restore
Restore the rails secrets
The GitLab chart expects rails secrets to be provided as a Kubernetes Secret with content in YAML. If you are restoring the rails secret from a Linux package instance, secrets are stored in JSON format in the /etc/gitlab/gitlab-secrets.json file. To convert the file and create the secret in YAML format:
- Copy the file /etc/gitlab/gitlab-secrets.json to the workstation where you run kubectl commands.
- Check if the yq tool is correctly installed (version 4.21.1 or later) on your workstation.
- Run the following command to convert your gitlab-secrets.json to YAML format:
yq -P '{"production": .gitlab_rails}' gitlab-secrets.json -o yaml >> gitlab-secrets.yaml
- Check that the new gitlab-secrets.yaml file has the following contents:
production:
 db_key_base: <your key base value>
 secret_key_base: <your secret key base value>
 otp_key_base: <your otp key base value>
 openid_connect_signing_key: <your openid signing key>
 active_record_encryption_primary_key:
 - 'your active record encryption primary key'
 active_record_encryption_deterministic_key:
 - 'your active record encryption deterministic key'
 active_record_encryption_key_derivation_salt: 'your active record key derivation salt'
To restore the rails secrets from a YAML file:
- Find the object name for the rails secrets:
kubectl get secrets | grep rails-secret
- Delete the existing secret
kubectl delete secret <rails-secret-name>
- Create the new secret using the same name as the old, and passing in your local YAML file
kubectl create secret generic <rails-secret-name> --from-file=secrets.yml=gitlab-secrets.yaml
Restart the pods
In order to use the new secrets, the Webservice, Sidekiq and Toolbox pods need to be restarted. The safest way to restart those pods is to run:
kubectl delete pods -lapp=sidekiq,release=<helm release name>
kubectl delete pods -lapp=webservice,release=<helm release name>
kubectl delete pods -lapp=toolbox,release=<helm release name>
Restoring the backup file
The steps for restoring a GitLab installation are Make sure you have a running GitLab instance by deploying the charts. Ensure the Toolbox pod is enabled and running by executing the following command
kubectl get pods -lrelease=RELEASE_NAME,app=toolbox
Get the tarball ready in any of the above locations. Make sure it is named in the backup_ID_gitlab_backup.tar format. Read what the backup ID is about. Note the current number of replicas for database clients for subsequent restart:
kubectl get deploy -n <namespace> -lapp=sidekiq,release=<helm release name> -o jsonpath='{.items[].spec.replicas}{"\n"}'
kubectl get deploy -n <namespace> -lapp=webservice,release=<helm release name> -o jsonpath='{.items[].spec.replicas}{"\n"}'
kubectl get deploy -n <namespace> -lapp=prometheus,release=<helm release name> -o jsonpath='{.items[].spec.replicas}{"\n"}'
Stop the clients of the database to prevent locks interfering with the restore process:
kubectl scale deploy -lapp=sidekiq,release=<helm release name> -n <namespace> --replicas=0
kubectl scale deploy -lapp=webservice,release=<helm release name> -n <namespace> --replicas=0
kubectl scale deploy -lapp=prometheus,release=<helm release name> -n <namespace> --replicas=0
Run the backup utility to restore the tarball cat /home/git/.s3cfg
Example of correct configuration
cat <<EOF > "/home/git/.s3cfg"
[default]
access_key = gitlab_icsdqtaa
secret_key = XXX
bucket_location = us-east-1
host_base = s3-technique-hl.kosmos-s3.svc.cluster.local.:9000
host_bucket = s3-technique-hl.kosmos-s3.svc.cluster.local.:9000/%(bucket)
default_mime_type = binary/octet-stream
enable_multipart = True
multipart_max_chunks = 10000
multipart_chunk_size_mb = 128
recursive = True
recv_chunk = 65536
send_chunk = 65536
server_side_encryption = False
signature_v2 = True
socket_timeout = 300
use_mime_magic = False
verbosity = WARNING
website_endpoint = s3.kosmos.athea
use_http_expect = False
use_https = False
EOF
kubectl exec <Toolbox pod name> -it -- backup-utility --restore -t <backup_ID>
Here, backup_ID is from the name of the tarball stored in gitlab-backups bucket. In case you want to provide a public URL, use the following command:
kubectl exec <Toolbox pod name> -it -- backup-utility --restore -f <URL>
You can provide a local path as a URL as long as it’s in the format: file:///<path>
This process will take time depending on the size of the tarball.
The restoration process will erase the existing contents of database, move existing repositories to temporary locations and extract the contents of the tarball. Repositories will be moved to their corresponding locations on the disk and other data, like artifacts, uploads, LFS etc. will be uploaded to corresponding buckets in Object Storage.
Restart the application:
kubectl scale deploy -lapp=sidekiq,release=<helm release name> -n <namespace> --replicas=<value>
kubectl scale deploy -lapp=webservice,release=<helm release name> -n <namespace> --replicas=<value>
kubectl scale deploy -lapp=prometheus,release=<helm release name> -n <namespace> --replicas=<value>
During restoration, the backup tarball needs to be extracted to disk. This means the Toolbox pod should have disk of necessary size available. For more details and configuration please see the
Restore the runner registration token
After restoring, the included runner will not be able to register to the instance because it no longer has the correct registration token. Follow these troubleshooting steps to get it updated.
Find your Toolbox pod by executing the following command
kubectl get pods -lrelease=RELEASE_NAME,app=toolbox
Run the instance setup script to enable the necessary features
kubectl exec <Toolbox pod name> -it -- gitlab-rails runner -e production /scripts/custom-instance-setup
Restart the pods
In order to use the new changes, the Webservice and Sidekiq pods need to be restarted. The safest way to restart those pods is to run:
kubectl delete pods -lapp=sidekiq,release=<helm release name>
kubectl delete pods -lapp=webservice,release=<helm release name>
Technical information
Location
The service is deployed in Kubernetes:
- namespace : kosmos-dev
- pod: gitlab-gitaly-0
- pod: gitlab-gitlab-exporter-*
- pod: gitlab-gitlab-runner-*
- pod: gitlab-gitlab-shell-*
- pod: gitlab-kas-*
- pod: gitlab-redis-master-0
- pod: gitlab-registry-*
- pod: gitlab-sidekiq-all-in-1-v2-*
- pod: gitlab-toolbox-*
- pod: gitlab-webservice-default-*
Initial Configuration
Interfaces
The GitLab service is exposed via an ingress. It is exposed via https on port 443.
Access to GitLab is via the SSO portal or directly with an internal GitLab account.
Logs
GitLab logs can be viewed:
- via the Grafana dashboard Kosmos Logs
- via the command
kubectl -n kosmos-dev logs [pod]directly
Failure Combination
GitLab is not a critical component of the system. It is therefore not deployed in High Availability mode.
At runtime, GitLab's availability is required for:
- Deployment/commissioning of all platform components;
- Deployment/commissioning of an application;
- Receiving an application delivery;
- Procedures for implementing new security policies;
- Developments in Jupyter (pull/push not possible), but it's still possible to submit your code locally during the downtime.